Cardboard Tube Command Center: Upcycled Desk Organizers (Beyond Pens!)
Introduction: Unleash Your Inner Upcycler
Tired of desk clutter? Pens rolling away, paperclips scattered, and a general sense of disorganization overwhelming your workspace? Fear not! You don't need to spend a fortune on fancy organizers. The solution might be right in your recycling bin: cardboard tubes! This guide will show you how to transform humble cardboard tubes into a stylish and functional command center that will not only declutter your desk but also unleash your inner upcycling artist. Get ready to create personalized desk organizers that go way beyond just holding pens.
We'll explore different techniques, design ideas, and customization options to help you craft organizers that perfectly suit your needs and aesthetic. This project is not only budget-friendly and eco-conscious but also a fun and rewarding way to express your creativity. Whether you're a student, a professional, or simply someone who appreciates a tidy workspace, this guide will empower you to create a Cardboard Tube Command Center that will transform your desk from chaotic to captivating.

Gathering Your Supplies: The Upcycling Toolkit
Before diving into the crafting process, let's gather the essential supplies. The beauty of this project is its reliance on readily available and often discarded materials. Here's a list of what you'll need:
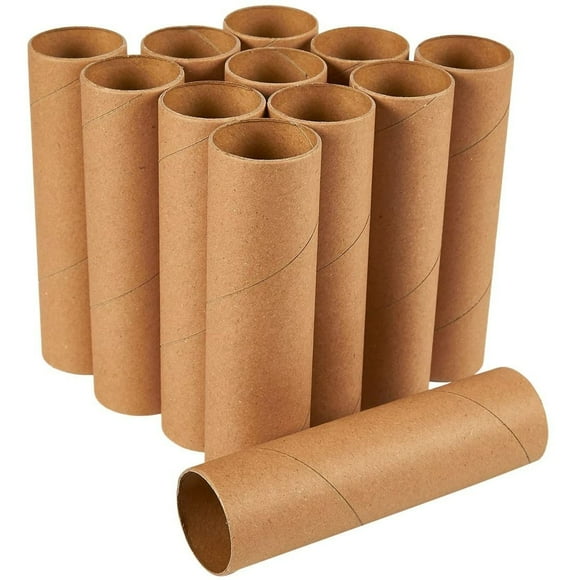
- Cardboard Tubes: Collect various sizes of cardboard tubes from toilet paper rolls, paper towel rolls, wrapping paper rolls, or even mailing tubes. The more diverse the sizes, the more versatile your organizer will be.
- Cutting Tools: A sharp craft knife or scissors for cutting the tubes to desired lengths. A utility knife is best for thicker tubes, but always exercise caution.
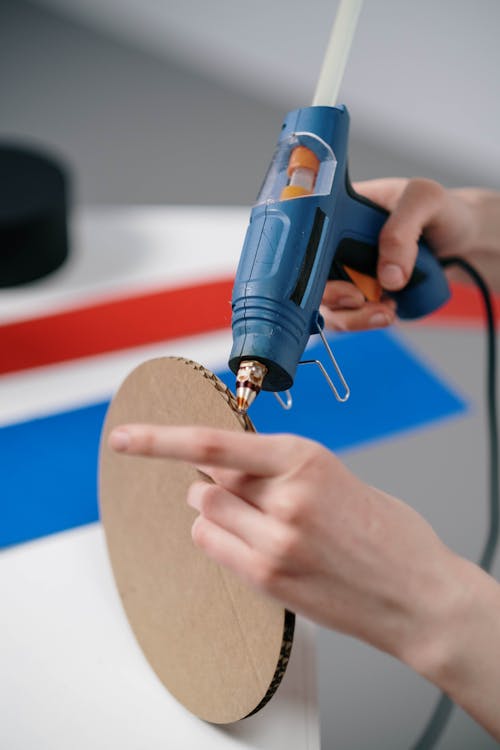
- Adhesive: Choose a strong adhesive like hot glue, craft glue, or even double-sided tape. Hot glue provides a quick and secure bond, but craft glue allows for more repositioning time.
- Decorating Materials: This is where your creativity shines! Gather paint, wrapping paper, fabric scraps, washi tape, markers, glitter, yarn – anything that inspires you to personalize your organizers.
- Base Material (Optional): A piece of cardboard, a wooden plank, or even a recycled tray can serve as a base to group your organizers together.
- Ruler or Measuring Tape: Essential for precise cutting and ensuring uniform heights.
- Pencil or Marker: For marking cutting lines and adding decorative details.
Remember to prioritize safety when using cutting tools and hot glue. A cutting mat is recommended to protect your work surface. With your supplies gathered, you're ready to start transforming those humble cardboard tubes into functional works of art!
Planning Your Command Center: Design and Layout
Before you start gluing and decorating, take some time to plan the layout and design of your Cardboard Tube Command Center. Consider what items you need to organize and how you want your organizers to look. Here are some factors to consider:
- Functionality: What specific items will you be storing in your organizers? Pens, pencils, scissors, paperclips, sticky notes, makeup brushes, small tools? Tailor the size and shape of your tubes to accommodate these items.
- Tube Height: Varying the height of the tubes adds visual interest and allows for storing items of different lengths. Taller tubes are perfect for pens and pencils, while shorter tubes can hold smaller items like paperclips or erasers.
- Arrangement: Experiment with different arrangements of the tubes. Consider grouping them by size, color, or function. A circular arrangement can create a visually appealing centerpiece, while a linear arrangement might be more practical for a narrow desk.
- Base (Optional): Using a base provides stability and keeps your organizers together. You can arrange the tubes directly on your desk, but a base makes it easier to move the entire command center.
- Aesthetic: Think about the overall style you want to achieve. Do you prefer a minimalist look with neutral colors, or a vibrant and eclectic design with bold patterns? Choose decorating materials that reflect your personal style and complement your existing desk decor.
Sketch out your design on paper or arrange the tubes on your desk to visualize the final product. This planning stage will save you time and ensure that your Cardboard Tube Command Center meets your specific needs and aesthetic preferences.

Construction Techniques: Building Your Organizers
Now that you have a plan, it's time to start constructing your Cardboard Tube Command Center. Here are some essential techniques to guide you through the process:
- Cutting the Tubes: Use a ruler and pencil to mark the desired cutting lines on the tubes. Use a sharp craft knife or scissors to carefully cut along the lines. For thicker tubes, a utility knife may be necessary. Always use a cutting mat to protect your work surface and exercise caution when using sharp tools.
- Gluing the Tubes: Apply a generous amount of glue to the bottom edge of each tube. If using a base, position the tube on the base and hold it in place until the glue sets. If not using a base, glue the tubes together side-by-side to create a stable structure. Hot glue provides a quick and strong bond, but craft glue allows for more repositioning time.
- Creating Compartments: For added organization, consider creating compartments within the tubes. You can use small pieces of cardboard to divide the tube into sections, gluing them in place with craft glue or hot glue.
- Adding a Base (Optional): If you're using a base, arrange the glued-together tubes on the base and secure them with glue. You can also add decorative elements to the base, such as paint, fabric, or wrapping paper.
- Reinforcing the Structure: For added stability, especially for larger organizers, consider reinforcing the structure with tape or additional cardboard supports.
Remember to allow the glue to dry completely before moving on to the decorating stage. With these construction techniques, you can transform your cardboard tubes into sturdy and functional desk organizers.
Decoration and Personalization: Adding Your Unique Touch
This is where you can truly let your creativity shine! Decorating your Cardboard Tube Command Center is all about adding your personal touch and transforming it from a functional organizer into a stylish desk accessory. Here are some ideas to inspire you:
- Painting: Use acrylic paints, spray paint, or even chalkboard paint to cover the tubes in your desired colors. You can create solid colors, stripes, patterns, or even ombre effects.
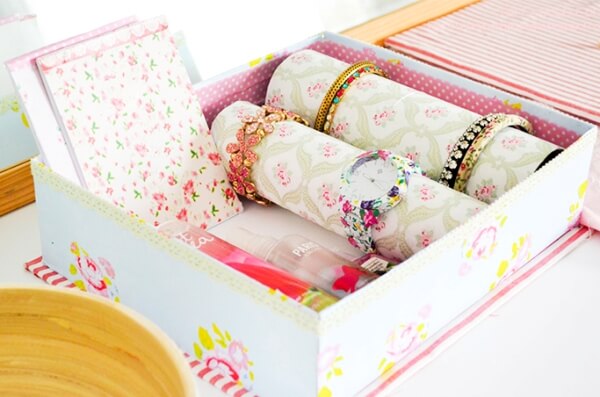
- Wrapping Paper: Cut pieces of wrapping paper to fit around the tubes and secure them with glue or double-sided tape. Choose wrapping paper with patterns that complement your desk decor.
- Fabric Scraps: Wrap the tubes in fabric scraps, securing them with glue or fabric tape. This adds texture and visual interest to your organizers.
- Washi Tape: Use washi tape to create colorful borders, patterns, or even cover entire tubes. Washi tape is easy to apply and remove, making it a great option for experimenting with different designs.
- Markers and Pens: Use markers and pens to draw designs, write labels, or add personalized messages to your organizers.
- Embellishments: Add embellishments like buttons, beads, glitter, yarn, or ribbon to further personalize your Cardboard Tube Command Center.
Don't be afraid to experiment with different techniques and materials. The goal is to create organizers that reflect your personal style and make you happy every time you look at them. Consider using Canva to design labels or patterns to print and attach to your organizers.
Beyond the Basics: Advanced Upcycling Ideas
Once you've mastered the basic techniques, you can explore more advanced upcycling ideas to take your Cardboard Tube Command Center to the next level. Here are some suggestions:
- Tiered Organizers: Create a tiered organizer by stacking tubes of different heights on top of each other. This maximizes vertical space and adds visual interest.
- Rotating Organizers: Attach the base of your organizer to a lazy Susan or rotating platform to create a rotating organizer that allows easy access to all your supplies.
- Wall-Mounted Organizers: Attach the tubes to a piece of wood or cardboard and mount it on the wall to create a wall-mounted organizer. This is a great option for small desks or workspaces.
- Custom Inserts: Create custom inserts for the tubes using cardboard or foam to further organize your supplies. For example, you can create a small cardboard divider to separate pens from pencils.
- Labeling System: Implement a labeling system to easily identify the contents of each tube. You can use labels, tags, or even write directly on the tubes with a marker.
By exploring these advanced upcycling ideas, you can create a Cardboard Tube Command Center that is not only functional and stylish but also a unique reflection of your creativity and resourcefulness. Remember to share your creations on social media using relevant hashtags like #upcycling #DIY #deskorganizer #cardboardcrafts.

So go forth, get crafting, and create a command center that sparks joy and helps you conquer your day!
-YourDad


Comments
Post a Comment